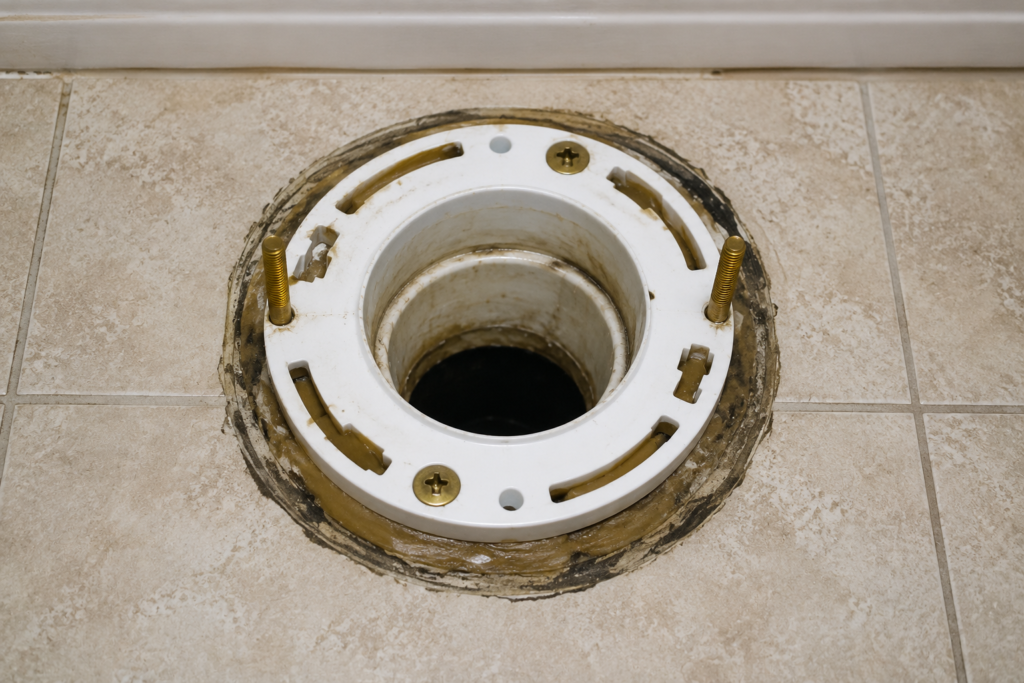
A damaged toilet flange is one of the most common causes of leaking toilets, unpleasant odors, and unstable toilet bases. Understanding the Toilet Flange Replacing process can help homeowners recognize the problem and appreciate the importance of a proper installation for a long-lasting, leak-free bathroom.
This guide explains the essential steps involved in removing a damaged toilet flange, installing a replacement, and following professional plumbing practices to ensure reliable performance.
Why Toilet Flange Replacing Is Important
The toilet flange connects the toilet to the drain pipe while securing it firmly to the floor. When the flange becomes cracked, broken, or loose, it can lead to several plumbing issues, including:
- Water leaks around the toilet base
- Unpleasant sewer gas odors
- A rocking or unstable toilet
- Damage to flooring and subfloor materials
- Failed wax ring seals
Replacing a damaged flange restores the toilet’s stability and helps prevent costly water damage.
Inspecting the Existing Toilet Flange
Before beginning any Toilet Flange Replacing project, carefully inspect the existing flange to determine its condition.
Signs that replacement may be necessary include:
- Visible cracks
- Broken mounting slots
- Corrosion or deterioration
- Loose attachment to the floor
- Previous repair attempts that have failed
Whenever possible, professionals try to replace only the damaged flange without removing or breaking the surrounding concrete floor.
Removing the Damaged Flange
The first step is shutting off the water supply and removing the toilet to gain access to the flange.
Once exposed, the damaged PVC flange can be carefully removed using appropriate hand tools such as pry bars and cutting tools. Taking time during removal helps avoid damaging the drain pipe beneath the floor.
A helpful professional practice is inserting a test ball into the drain opening before beginning the work. This prevents broken PVC pieces, dust, and construction debris from falling into the drain line while the flange is removed.
Installing the New Toilet Flange
After cleaning the drain opening, a new replacement flange is installed securely onto the drain pipe.
In many plumbing repairs, a four-inch internal PVC flange provides a reliable replacement solution. Proper alignment is critical so the toilet mounting bolts line up correctly and the toilet sits squarely on the finished floor.
If the concrete floor is recessed or sits below the finished flooring level, the flange may not reach the ideal height. In these situations, using a larger wax ring helps create a dependable watertight seal between the toilet and the flange.
Finally, the new flange should be firmly anchored to the floor using appropriate fasteners to prevent future movement.
Professional Tips for Toilet Flange Replacing
Following professional plumbing practices improves the quality and longevity of the repair.
Some important recommendations include:
- Always wear safety glasses while cutting or removing PVC components.
- Use a test ball to keep debris out of the drain system.
- Clean pipe surfaces thoroughly before applying PVC primer and cement.
- Ensure a complete glue joint when installing PVC fittings.
- Secure the flange tightly to the floor to eliminate toilet movement.
- Verify that the flange is level before reinstalling the toilet.
- Test for leaks after completing the installation.
Ensuring a Leak-Free Installation
Once the new flange is installed, the toilet can be reinstalled using a properly sized wax ring and securely tightened mounting bolts.
After reconnecting the water supply, flush the toilet several times while inspecting around the base for any signs of leakage. A properly completed Toilet Flange Replacing project should result in a stable toilet, a secure seal, and years of dependable performance.
Final Thoughts
Completing a Toilet Flange Replacing project correctly is essential for maintaining a reliable plumbing system. Careful removal of the damaged flange, proper installation of the replacement, secure anchoring, and attention to professional plumbing standards all contribute to a durable, leak-free repair.
Whether addressing a cracked flange or upgrading an aging installation, replacing the toilet flange correctly helps protect your home from water damage while ensuring your toilet remains safe, stable, and fully functional.
Read Also: Sharkbite Fittings: Pros, Cons & Professional Plumbing Guide